
How to use KingRoot to Root the Fire TV, Install Custom Recovery, and Install a Pre-Rooted ROM (Next Best Method).
Page 1 of 2Updated: April 6, 2016
This tutorial is a compilation of a series of tutorials that I stitched together from AFTV News. Like all my tutorials this is written from a Mac user's perspective.
I want to thank the coders over at KingRoot for this very simple and quick program. I also want to thank rbox (XDA Forums) for all his incredible work in creating TWRP custom recovery and the installer and the pre-rooted ROMs. A big thank you to zeroepoch (XDA Forums) for discovering the rooting method. I'm really enjoying my Amazon Fire TV with all the extra features I'm able to add to it. Thanks guys!
Who is this tutorial NOT for?
- Fire TV OS 5.0.5.1 (or newer).
Who is this tutorial for?
- Mac users. I am on OS X El Capitan 10.11.
- Fire TV 2nd generation models (4k video) new out of the box, or never rooted and on 5.0.4 or 5.0.5 firmware. I don't know if there are other scenarios that might apply like previously rooted devices.
Prerequisites
- You'll need a USB hub (possibly powered if using an external hard drive).
- Either a hard drive, flash drive or a Micro SD card in FAT 32 format and at a minimum 1 GB in capacity.
- A USB keyboard and mouse. I personally have the Logitech K400 Plus. This includes a built in trackpad. Here's a K400 Plus custom neoprene sleeve to protect it.
- I used a brand new out of the box Fire TV for this. Absolutely nothing has been previously done to it.
Step 1.
Let's start off by downloading two things:- The adbFire application. Open the compressed file and place the application into your Applications folder. Do not run it from the installer! and
- KingRoot version 4.1 from this thread at XDA Forums. It is an attachment at the bottom of post 1.
Step 2.
On your Fire TV go to Settings, System, Developer Options and turn on ADB debugging. This will let you connect to the Fire TV via your computer using the adbFire application. There are other methods you can use to do this.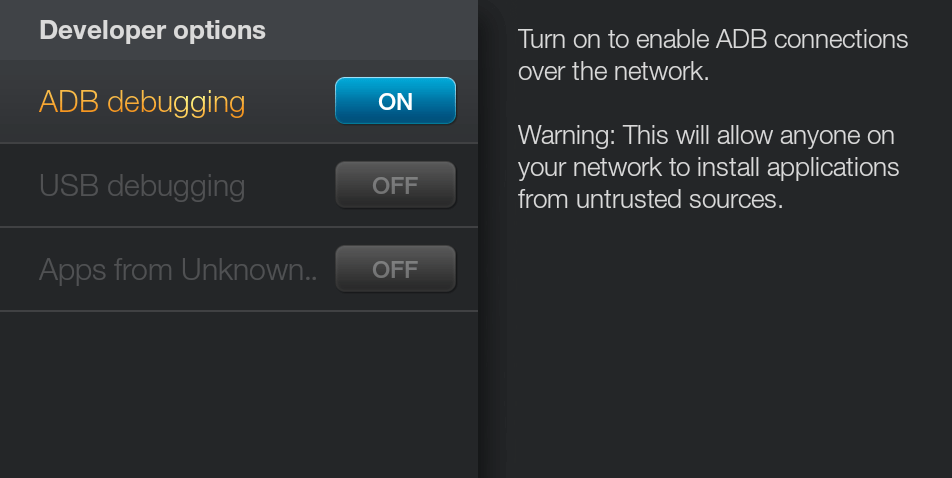
Step 3.
Find your Fire TV's IP address. Go to Settings, System, About, Network. Mine is 192.168.0.28.
Step 4.
Launch the adbFire application. Here's what the program looks like.
Click the New button.

In the Description field enter the name you want to call your Fire TV. In the Address field enter your IP address. Leave everything else the way you see it here. Click the Save button when you're done.
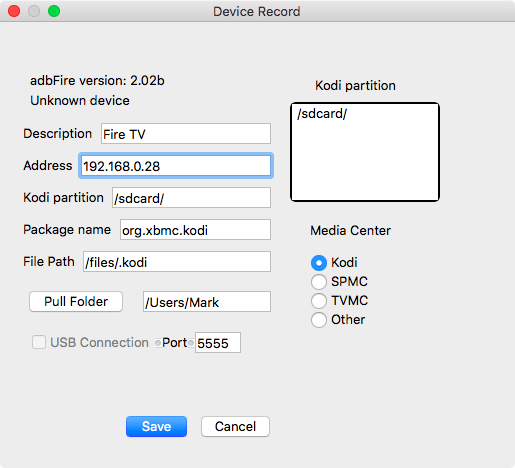
In the Current device drop down box you should now see the name you entered for your Fire TV. Click the Connect button.

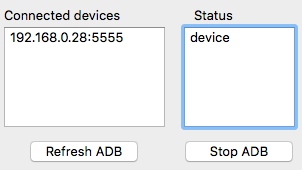
In the Connected devices box you should see your IP address, and in the Status box you should see "device".
Step 5.
Click the Install APK button.
Navigate to where you placed the KingRoot apk file, select it, and click Open.

You'll be asked to confirm this action so click Yes.

There is a status bar at the bottom of adbFire. This should only take a minute to install.

A pop up will appear once it has installed. Click OK.

On your Fire TV go to the Home screen then scroll down to Apps. You'll see it as the first icon in Your Apps Library. It's the lightning bolt. Click it.

Click it again.

Step 6.
The program will first check your root status. If you aren't already rooted it will say that root access is unavailable. Click the TRY TO ROOT button. It will take a minute or less to root. 22% was the highest number I saw. On my second run through it did go all the way up to 100%. It's just really fast between 22-100. I also received a pop up message on the Fire TV stating KingRoot had root access.

When the program has finished you'll see this screen. Do NOT click the PURIFY button.

I backed out of the program.

Step 7.
Download the latest version of the Fire TV 2 Recovery file from the XDA Developer Forums here. The file is called firetv2_recovery_v5.zip.• Note that there are several versions of this file. At the time of this tutorial being written the most current version was posted February 14, 2016, and is labelled "v5" (meaning version 5) with an md5sum: 16c957c86f1f61160e14a55819610707
• I am also hosting the version 5 file here because I don't like file download sites.
Download the latest pre-rooted Fire TV 2 ROM from the XDA Developer Forums here. This file is called sloane-5.0.5-rooted_r4.zip.
• Note that there are several versions of this file. At the time of this tutorial being written the most current version was posted February 14, 2016, and is labelled "5.0.5_r4" (meaning Fire TV firmware version 5.0.5, revision 4) with an md5sum: 9145c8f6d52fda2c3cfdd1d091bcb331
• I am NOT hosting this particular file as it is 425 MB. Love those file download sites.
Now that you have these two files you may want to check the md5sums to make sure the files are authentic. Keep in mind that md5 isn't as secure a method of verifying a file's integrity any more (you can maliciously tamper with a file to make the code verify). However this is how you would check its authenticity.

Open the Finder and go to your Applications folder, then go into the Utilities folder. Launch the Terminal application.

Enter "md5" and then put a space after it, and then drag a file into the Terminal window. The Terminal will enter the path to the file for you. Press the Enter key and it will provide the check code for the file.

Step 8.
Let's install that firetv2_recovery_v5.zip file. In adbFire select "sdcard" in the Preset directories drop down box. Click Push.
Then select the firetv2_recovery_v5.zip file (if that's the name of the file you downloaded) from the previous step and click Open.

Confirm this action by clicking Yes.

The file will be sent over. Click OK when it's finished.

Click ADB Shell.

A Terminal window will open. Enter: su and then press Enter. The next line must say root@sloane:/ #. If you don't see this then you are not at root.

If instead you see [-] Unallowed user, then try launching the Kinguser application on your Fire TV and running it.

Then click Allow when prompted to grant permission. Then enter su again in the Terminal and it should work.

I do not recommend copying and pasting this next command as the quote marks may not work in the Terminal as they can be encoded unexpectedly when copying them from a website. Also note that at the posting of this tutorial, firetv2_recovery_v5.zip was the current version of recovery. If you downloaded a different version then enter that file name.
su -c "sh /sdcard/firetv2_recovery_v5.zip"
You should see that the file is being extracted and /system is being remounted.

Note that the first time I went through these instructions I couldn't log in as su in the ADB Shell so that I could block OTA updates and I had nothing but problems with ADB and connectivity.
So I reinstalled KingRoot and went through this process a second time. The next time I got to this step and pushed the fire recovery file to the Fire TV and tried to unzip it I received the message mount: Device or resource busy. Don't worry about this as we'll be installing a ROM afterward.
