
How to Install Kodi (a media player), FireStarter (a launcher replacment) and use an External Hard Drive for Media Content.
Page 1 of 2Updated March 26, 2016
I must admit I have really enjoyed my Apple TVs (first generation models) these last few years. But I got the bug to move my content to a more modern device and not live in such a tightly controlled ecosystem. I didn't upgrade to a newer Apple TV model because they don't allow the USB jack to communicate to external hard drives and I didn't want to stream my all my personal content and clog up the network. Enter the Amazon Fire TV. Now I know what you're gonna say next: the Fire TV lives in its own walled garden too. Out of the box yes it does, but once you start side loading applications (and adding an external hard drive with your own personal media on it), or rooting it to add even more media sources (and file formats like NTFS for those massive HD movie files), it becomes much more open.
We cut the cable a few years ago because the price for cable TV just became BEYOND RIDICULOUS. Since then I've really come to enjoy Netflix. So the search was on to find an Android box with good specifications, a track record of reliability, updates and a big name behind it. Fire TV fit the bill. The hardware blows away the Apple TVs I've been using; this certainly isn't Apple's fault, I was just using old hardware.
The Fire TV was my first foray to into the Android world (Minix was my second). There's a slew of options out there and if you search you'll find many tutorials on different ways to do this. I'm going to show you how I did it.
But first let's talk about movie formats: SD (standard definition) and HD (high definition) and how they relate to various file systems. Remember I'm a Mac user running OS X 10.11 El Capitan.
By default I can format a hard drive in several formats, but only one of them is useful
as far as Kodi is concerned: MS-DOS (FAT) which is FAT 32. We can use NTFS with Kodi,
but you need to install a program on your Mac to format and write to an NTFS hard drive.
FAT 32 formatted hard drives are limited in that a single file can be no larger than 4 GB in size. This is a limitation of the file system that Microsoft created and nothing more. So what this means is while you can use SD videos on a FAT 32 hard drive, you most likely won't be able to use any HD content on this hard drive. I've yet to see a movie in HD format smaller than 4 GB unless the movie was less than an hour or so in length.
So what do we do with these larger movie files? I'm also going to format a hard drive using NTFS. Now you don't have to worry about file size being an issue any more. Remember the Fire TV by default only recognizes the first hard drive plugged in to a hub. One way around this is rooting and using a program called BusyMount.
FAT 32 formatted hard drives are limited in that a single file can be no larger than 4 GB in size. This is a limitation of the file system that Microsoft created and nothing more. So what this means is while you can use SD videos on a FAT 32 hard drive, you most likely won't be able to use any HD content on this hard drive. I've yet to see a movie in HD format smaller than 4 GB unless the movie was less than an hour or so in length.
So what do we do with these larger movie files? I'm also going to format a hard drive using NTFS. Now you don't have to worry about file size being an issue any more. Remember the Fire TV by default only recognizes the first hard drive plugged in to a hub. One way around this is rooting and using a program called BusyMount.
I will show you how to use both FAT 32 and NTFS with Kodi. FAT 32 formatting is built into your Mac, the program needed to format NTFS is made by the Paragon Software Group. I can't get the trial download button to work on their site so I went to MacUpdate to get it. It does have a trial version. If you're going to purchase it you might want to go through MacUpdate.
There will be two sections in this tutorial depending on what you want to do. Method 1: Using a FAT 32 Formatted Hard Drive, and Method 2: Using an NTFS Formatted Hard Drive. Method 1 will also include instructions for how to use adbFire and FireStarter which also applies to Method 2, I just won't be repeating them.
Here is what I purchased to make this all happen:
- The hard drive of your choice. Here's a Seagate 2 TB model I purchased. It's a USB 3.0 model and requires external power as the Fire TV does not supply power via the USB jack.
- A powered USB hub (based on the needs of your hard drive). Here's an Anker hub. You don't need a lot of ports. Keep in mind the Fire TV will only recognize the first hard drive you plug in (unless you root the Fire TV and use a program like BusyMount). You may want extra jacks for a keyboard or mouse or game controller, etc.
- A USB keyboard and a mouse (ideally connected to a hub but you can hot swap these in the Fire TV). I personally have the Logitech K400 Plus. This includes a built in trackpad. Here's a K400 Plus custom neoprene sleeve to protect it.
- Kodi. This is the interface that you'll access your content with. Think of it as an iTunes without the store.
- The adbFire application for using your computer to talk to your Fire TV to install Kodi.
- FireStarter for programming the Fire TV home button to make it easier to launch Kodi and other applications you have installed on the Fire TV.
- NTFS for Mac OS X.
Method 1: Using a FAT 32 Formatted Hard Drive - Step 1.
Download all the programs you need.- Kodi can be downloaded from the project page here. The version I used is Isengard 15.2 for ARM devices.
- The adbFire application. Open the compressed file and place the application into your applications folder.
- FireStarter v 3.2.2.
Step 2.
On your Fire TV go to Settings, System, Developer Options and turn on ADB debugging. This will let you connect to the Fire TV via your computer using the adbFire application.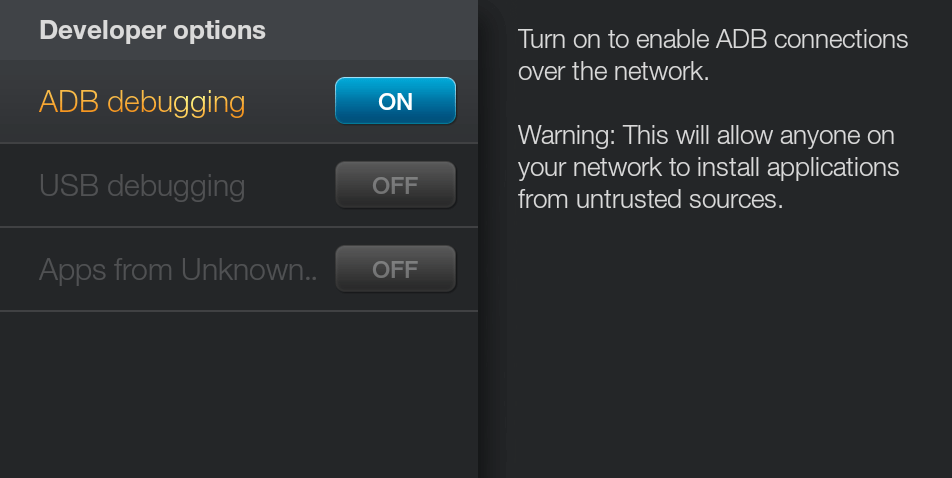
Step 3.
Find your Fire TV's IP address. Go to Settings, System, About, Network. Mine is 192.168.0.28.
Step 4.
Launch the adbFire application. I'm using a Mac but this can be done on Linux and Windows as well. Here's what the program looks like.
Click the New button.

In the Description field enter the name you want to call your Fire TV. In the Address field enter your IP address. Leave everything else the way you see it here. Click the Save button when you're done.
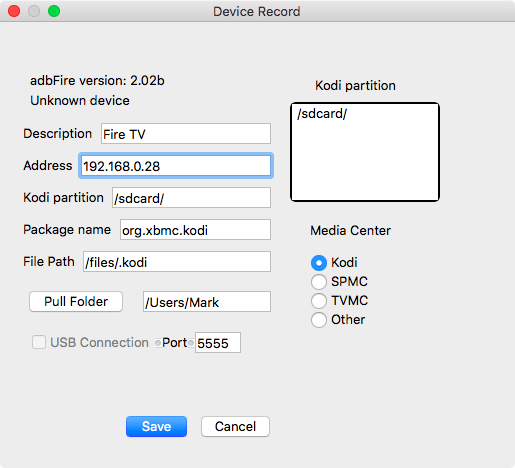
In the Current device drop down box you should now see the name you entered for your Fire TV. Click the Connect button.

In the Connected devices box you should see your IP address, and in the Status box you should see "device".
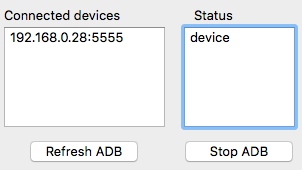
Step 5.
Click the Install APK button.
Navigate to where you placed the Kodi apk file and select it and click Open.

A pop up message will ask you to confirm you choice. Click Yes.

This should only take a few minutes to install. A pop up will appear once it has finished.

On your Fire TV go to the Home screen and then scroll down to Apps. You should see it in the first position.

If you don't see Kodi there, then go to Settings, Applications, Manage All Installed Applications, go to Kodi and click on it.

Then click Launch application.
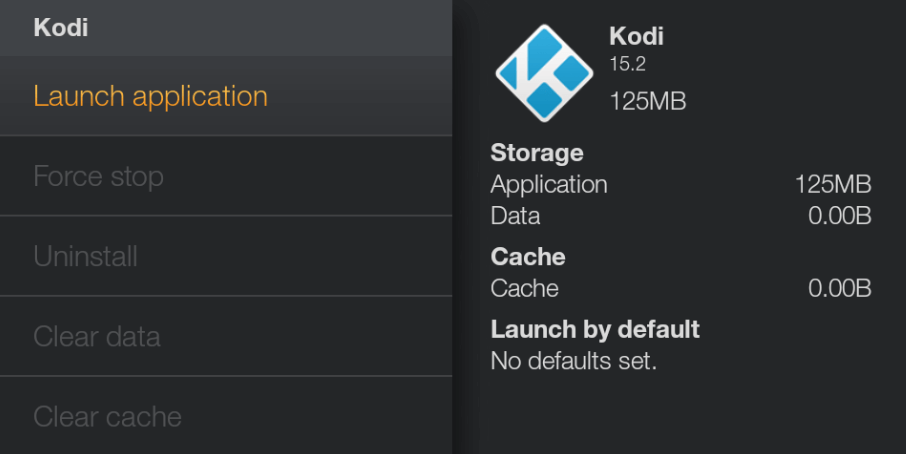
Step 6.
Here's the first screen you'll see when launching Kodi for the initial time.
Here's the default screen. There are themes available. Kodi will start checking for various updates and add ons and it will take two or three minutes to do this so let it continue.

You can attach your hard drive at this point. Kodi will see the connection and your Fire TV will most likely restart when you do this. To see my files (mine are all videos by the way) I go to VIDEOS and select Files
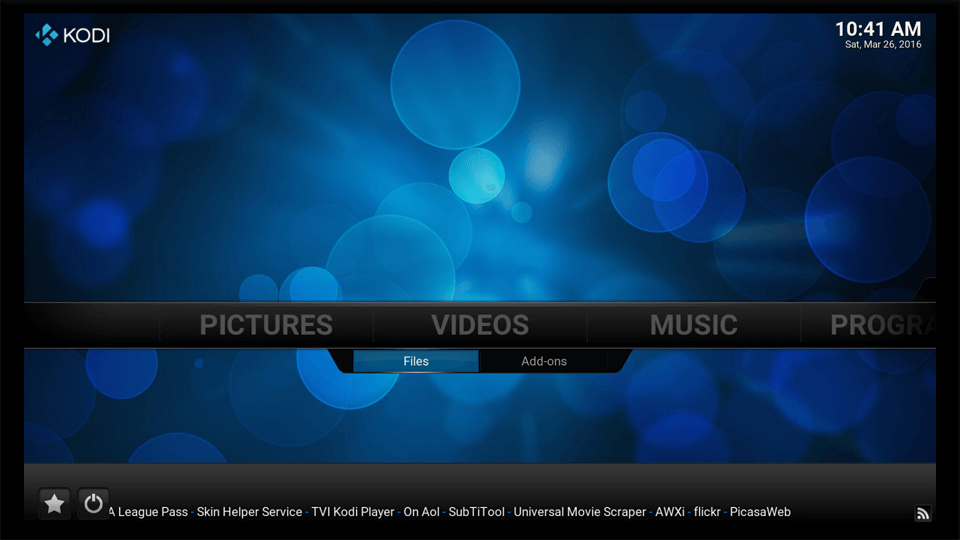
Select Files at this screen.
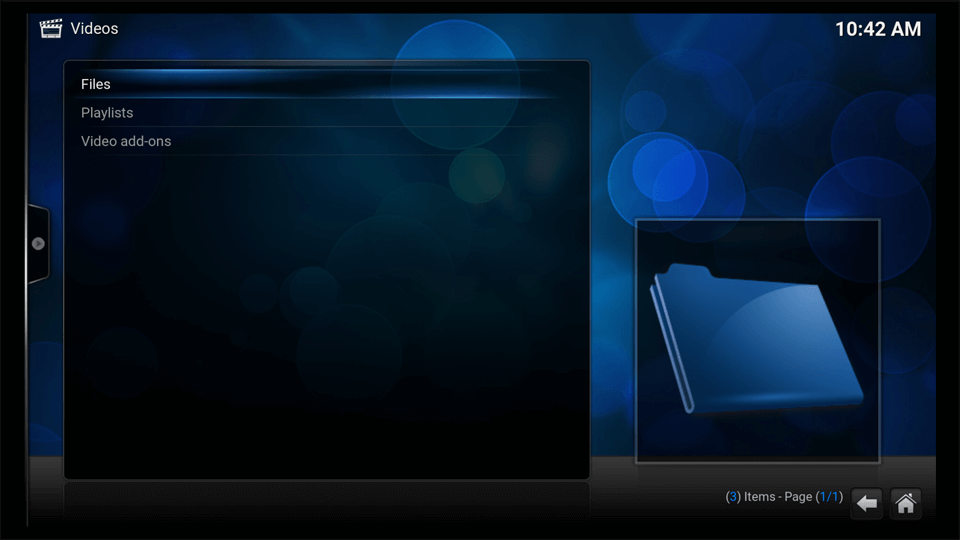
Select usbotg (USB on the go). I haven't found a way to change the name of this, I think we're stuck with it.

You will now see all the files on your hard drive. I organize my movies and TV shows into folders and subfolders to make it less messy. So that was how to access your FAT 32 hard drive.
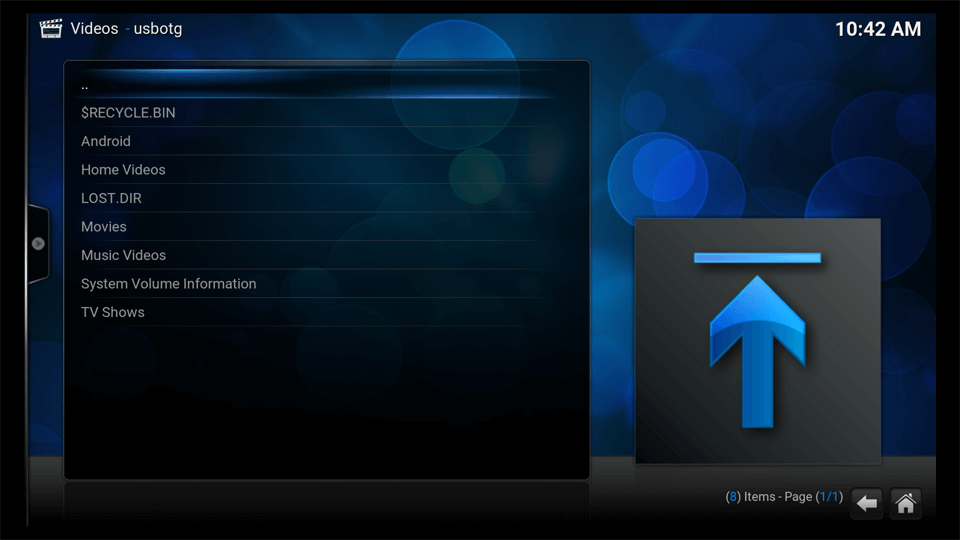
Step 7.
Now let's install FireStarter to make it easier to launch Kodi (and any other applications you install). Click the Install APK button.
Navigate to where you placed the FireStarter apk file and select it and click Open.
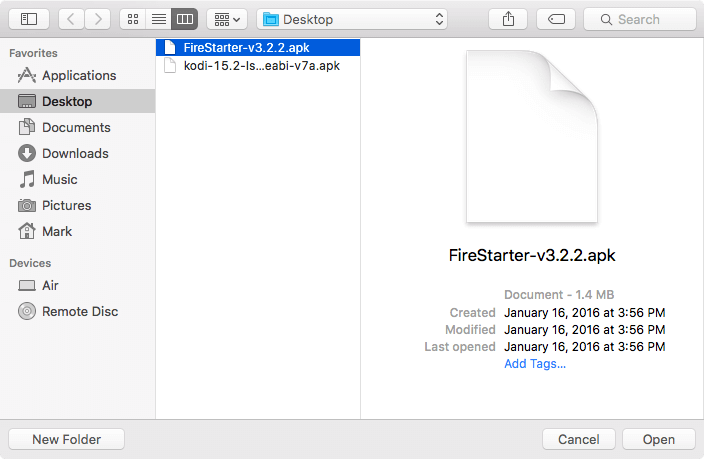
Once the program has finished installing close the adbFire application.
Step 8.
Go back to the Home screen and scroll down to Apps and you should see it there. Launch it.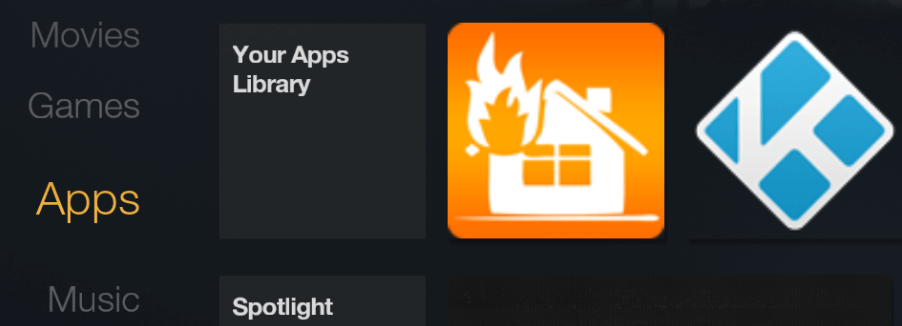
If it's not there then go to Settings, Applications, Manage All Installed Applications, go to FireStarter and click on it then click Launch application.

You'll be at this screen now. You'll notice I've previously installed AdAway which is great for blocking ads in YouTube.

Scroll to the left and down to Settings. These are the FireStarter settings you are looking at. Scroll down the list to the Background Observation section. Ensure Enable background observation, Fallback to Non-ADB Observation and Home-Detection via ADB boxes are checked.

Click on Open ADB Settings (as seen in the screen shot above). Turn off ADB Debugging and turn it back on again.
Try pressing your Home button on the Fire TV remote to see if it will toggle between the Fire TV Home screen and the FireStarter Home screen. If it does great. If it didn't then restart your Fire TV by pressing and holding the Select button (the round one inside the ring) and the Play/Pause buttons for 5 seconds.
Now when you press the Home button on the remote it will toggle between the normal Fire TV home screen and the FireStarter home screen.