
How to Root the Fire TV, Install TWRP Custom Recovery, and a Pre-Rooted ROM. (2nd Next Best Method)
Page 1 of 2Updated: April 15, 2016
I previously wrote this tutorial for those on 5.0.5 firmware. Since 5.0.5.1 firmware has been released I decided to update one of my Fire TVs to 5.0.5.1 and then root it by installing a pre-rooted ROM for 5.0.5 firmware instead. Yes there is a pre-rooted ROM for 5.0.5.1 as well. I'm doing this just to show you that it can be done. I don't personally care for 5.0.5.1 as it disables alternate launchers and FireStarter hasn't been officially updated to work with this new firmware. So if you are on 5.0.5 or 5.0.5.1 you can still use this tutorial to root.
Keep in mind as you read through this tutorial you will be downloading various files with which to root and some of the files are different depending on which firmware you want to root. So I will list file names for both 5.0.5 and 5.0.5.1 firmware. Just pick the one you want. You will notice that any screenshots showing firmware files will display 5.0.5. because that is what I'm installing. If you're going to be using 5.0.5.1 firmware then just select that firmware file instead.
This tutorial most likely never would've been written if it wasn't for this great Windows tutorial written by Elias over at AFTV News.com. That guy knows his stuff! I also want to thank Eric for his reply to my problem that I posted in that tutorial as he provided the critical missing code from a file which was needed to make this work on the Mac. I also want to thank rbox (XDA Forums) for all his incredible work in creating TWRP recovery, the installer, and the pre-rooted ROM and a big thank you to zeroepoch (XDA Forums) for discovering the rooting method. What a great community we have over at XDA Forums!
Who is this tutorial for?
- Mac users. I am on OS X El Capitan 10.11.
- Fire TV 2nd generation models (4k video) new out of the box, or never rooted (up to Fire OS version 5.0.5.1). I even used a Fire TV that didn't even get its first power up and ran it through this process.
Prerequisites
- Either a hard drive, flash drive or a microSD card in FAT 32 format and at a minimum 1 GB in capacity.
- You'll need a USB hub (possibly powered if using an external hard drive).
- A USB keyboard and mouse. I personally have the Logitech K400 Plus. This includes a built in trackpad. Here's a K400 Plus custom neoprene sleeve to protect it.
- A USB A to A cable. This is the exact one I used.
Step 1.
Download a version of the Fire TV 2 Recovery file from the XDA Developer Forums here.- For 5.0.5 firmware you'll want the file called firetv2_recovery_v5.zip. md5 sum 16c957c86f1f61160e14a55819610707
- For 5.0.5.1 firmware you'll want the file called firetv2_recovery_v6.zip. md5 sum 79c1a3efbac86618fa2cdbb4901fbd77
Step 2.
Download the latest version of the Fire TV 2 Recovery Installer file from the XDA Developer Forums here.- For either firmware the file is called install_firetv2_recovery_v3.zip. md5 sum d9432930b8a6d50b6b09c31ef698b209
Step 3.
Download a pre-rooted Fire TV 2 ROM from the XDA Developer Forums here.- For 5.0.5 firmware you'll want the file called sloane-5.0.5-rooted_r4.zip. md5 sum 9145c8f6d52fda2c3cfdd1d091bcb331
- For 5.0.5.1 firmware you'll want the file called sloane-5.0.5.1-rooted_r1.zip. md5 sum c6d8a11b7ca7a0b45a38af4f9f70cf2d
Step 4.
Now that you have these three files you may want to check the md5sums to make sure the files were not corrupted during the download process.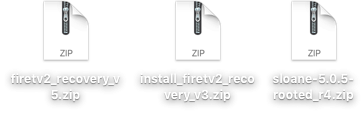
Open the Finder and go to your Applications folder, then go into the Utilities folder. Launch the Terminal application.
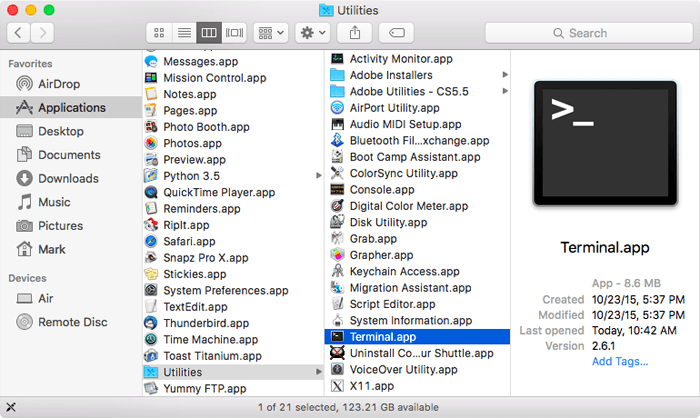
Enter
and then put a space after it. Then drag a file into the Terminal window. The Terminal will enter the path to the file for you. Press the Enter key and it will provide the check code for the file.md5

Step 5.
As long as you have the Terminal open we might as well use it to unzip two of the files you just checked. We need to unzip firetv2_recovery_v5.zip (or v6.zip) and install_firetv2_recovery_v3.zip. I find if you just double click the .zip file it'll turn into a .cpgz file and then if you double click that it turns back into a .zip file. Ugh. Terminal to the rescue!Enter
and then put a space after it. Then drag the .zip file into the Terminal and it will enter the path to the file. Now press Enter and it will unzip the file.unzip

It will place all the files in your user folder like this.

Now it's up to you where you want to place this handful of files. I chose to make a folder on the Desktop called RootTools and I placed all the files in there. Note that during Step 11 a file called comport.txt will appear here.
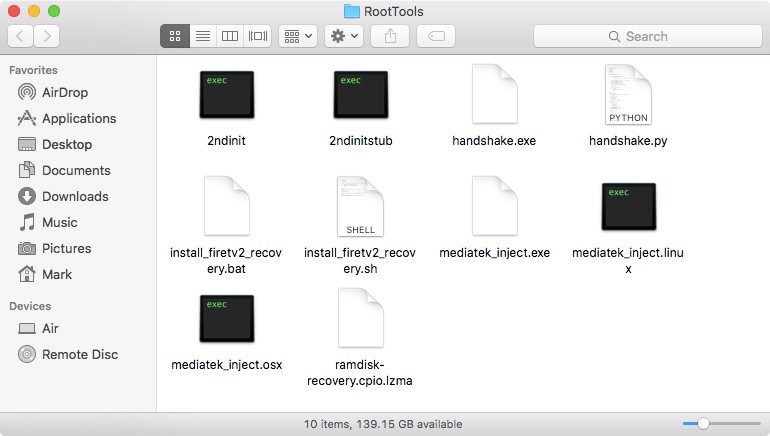
Step 6.
Locate where you placed all those files that you unzipped in Step 5. Look for the file install_firetv2_recovery.sh. This file needs to be modified because it's missing a couple lines of text and this causes the script to fail. The two lines that start with "echo “Unplug the USB cable" must be added in the appropriate location. Either edit it yourself to match the code in the box below, or you can just download the corrected file here.#!/bin/bash cd $(dirname $0) [[ $(uname -s) = “Darwin” ]] && INJECT=mediatek_inject.osx || INJECT=mediatek_inject.linux if [ ! -f 2ndinit -o ! -f 2ndinitstub ]; then echo “2ndinit and/or 2ndinitstub is missing.” echo “Did you extract all the zip files?” exit -1 fi ./handshake.py echo “Unplug the USB cable, then plug it back in. Press [Enter] to continue” read -n 1 -s echo “Injecting 2ndinit…” ./$INJECT firetv2 $(cat comport.txt) 2ndinit /system/bin/pppd u:object_r:system_file:s0 echo “Unplug the USB cable, then plug it back in. Press [Enter] to continue” read -n 1 -s echo “Injecting 2ndinitstub…” ./$INJECT firetv2 $(cat comport.txt) 2ndinitstub /system/bin/ext4_resize –
Step 7.
Copy the ramdisk-recovery.cpio.lzma file and the pre-rooted ROM sloane-5.0.5-rooted_r4.zip (or sloane-5.0.5.1-rooted_r1.zip) file to your USB drive or MicroSD card. Make sure your storage device is formatted as FAT 32. Make sure these files are placed in the top most directory (not in a folder). Do NOT unzip the ROM file.Here are my files on my USB drive.

Step 8.
Download Python 3.x here. You'll now have this file. Double click it.
Install Python.

Step 9.
Open the Terminal and enterand press Enter, and then enter your system password and press Enter again. A couple messages appeared about caching being disabled due to ownership issues. I don't know if this was a problem or not as I was able to root the Fire TV. Pyserial was then downloaded and successfully installed.sudo pip3 install pyserial

Step 10.
Disconnect the power cord from the Fire TV. Connect the A to A USB cable to the Fire TV and your computer DIRECTLY. Do not try to connect through a hub.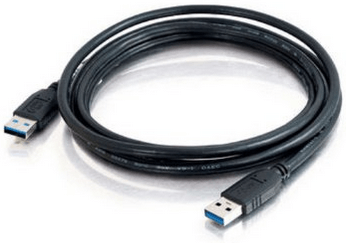
According to Zeroepoch's Wiki (the person who discovered the rooting method): You will need a USB A-Male to A-Male cable to perform any of these rooting procedures. It should be a straight cable with no circuitry in the middle, such as a "transfer" cable. You can find a list of USB cables that are known to work by following this link.
I purchased this cable on Amazon from Cables To Go.